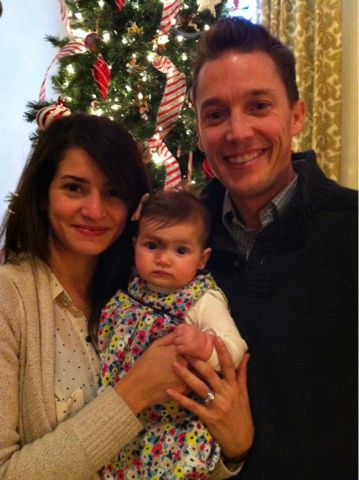
Tuesday, January 29, 2013

What's ahead...

When i was pregnant, a friend told me to read as much as possible about breastfeeding, because it would be a very overwhelming task at first. I watched some videos and read a blog here and there and thought I had done my research. However, I didn't feel like I had a set plan. In my head I wasn't sure I could physically do it, but I would like to try it for two reasons: to save money on formula and because I knew it was best for the baby. I thought it would be a natural thing and the baby would just latched like it was supposed to. If I didn't succeed it wasn't the end of the world. My friend was right and I was wrong in two things: first, it is really not that "natural" (in the sense of being easy) and secondly, I did want to succeed. I wanted to have that experience. I already had lacked on the natural birth part, after trying for 17 hours with no epidural or spinal, I had to be put to sleep. I had some minor complications in the end of the pregnancy, so I had to be induced at 37 weeks. Trying for a natural birth was a long shot. It was a little disappointing to not have it naturally but in the end, we were glad that she was here and she was healthy. The staff at the hospital was really helpful. If it weren't for the lactation consultants that came everyday on the last three days I am not sure I would have continued. At that point I wished I had read more about it. I wish I did know that their stomach is the size of a marble and that I didn't need to supplement with formula those first days, but that's what the nurses told me to do, so I did it. We, as first time parents were concerned because they said she lost over 10% of her weight, so we resorted to the bottle formula feeding mixed with the few drops of "liquid gold" we could pump. Another factor was that I had to have the help of a shield - more on that later - plus the terrible engorgement, it was a recipe for quitting the whole BF ordeal. Right after I was released I paid for two lactation visits. It was the best money we have ever spent. They helped me with the engorgement and with the techniques. We both did not have our mothers anymore, we lived away from our families, we didn't have many friends with kids around, so we were in this alone. My husband played a major part during those first weeks. If it wasn't for his support I would have quit easily. Hearing him say I could do it was all what I needed to keep trying. Again, I did not have a set plan of how long we were going to do this. It was a "living each day" kind of thing. Zoe drank exclusively breast milk after a week or two and stop the breast milk bottle after about a month. And then weeks passed, it became a little easier, but not yet smooth sailing, but I kept going. One thing still bothered me, the shield. It was a huge help, but it made it so much more difficult too. It's not like I did bf in public a lot. I did carry a hand pump and bottle to restaurants if I thought it will be hard to feed her, but if I had to bf at a friends house or something it was a pain. I call the lactation 1-800 when Zoe was almost 4 months and they said it was too late. She was too used to the shield, it was going to be a long term thing. A couple weeks later we went away and I prayed that I could get rid of the shield. On the same day I lost it. I was so tempted to just pump and give her a bottle, but I remembered that I had just prayed about it, so I tried to do it without it. She latched. I tried on the next feed and the next and the next. She was 4 1/2 mo and since then we had not used the shield. I can tell that she also prefer this experience. It's a lot less stressful and now IT IS natural and smooth sailing. I have been breast feeding her for all this time, she's 7 1/2 mo and super healthy and now I do plan on keep on going for as long as she wants it. I am so glad I stuck up to it.

Here are some links of timelines that helped me a lot with schedules (I still bf on demand, but follow a basic schedule structure):

  • On breastfeeding: http://www.thealphaparent.com/2011/12/timeline-of-breastfed-baby.html
  • On sleep: http://www.thealphaparent.com/2013/01/timeline-of-baby-and-toddler-sleep.html


Here are some of my essentials:

  • Instead of buying a bf cover, I just tie these swaddle blankets and put over around my neck. It's easy and makes it one less thing to buy/carry. 
  • Forget those floppy U-shaped bf pillows, this one is all you need and you don't have a baby that keeps sinking in between the pillow and you.
  • I could never remember what side and what time, how many wets and how many soiled, or how lone did she sleep if it wasn't for this app. Cheer for the 21st century! 
  • I love the Eames rocking chair, but I couldn't afford paying $500 on one. Here is a cheaper version that still rock the looks.
  • Burp cloths, you need lots of burp cloths!
  • And a comfy, sporty bra is an essential for the day-to-day, but make sure to buy a cute one too.
  • There might be situations when you need to pump, such as on airplanes, restaurants, or parks. I use this one.


I decided to write this post for the new moms who are trying to breast feed and get some zzz's, so I hope you enjoyed my story. Have a great day!

Saturday, January 19, 2013

Happy 2013 and a new DIY jazz-it-up your baby's clothes

Hi, I hope you all had a great holiday season. We had a great time visiting family in PA. It was a long drive from Missouri, which we did on two segments of 7-8 hours. We stopped in Columbus, OH for the night and got to spend time with friends and eat amazing food like breakfast at Tazi (they have the best sausage and gravy I've ever had and a delicious challah French toast with bananas and maple syrup.. Yumm!), french macaroons and shortbreads from Pistacia Vera, the best veggie burger in town from NorthStar Cafe and let's not forget the Salty Caramel and Sweet potato with roasted marshmallows ice cream from Jeni's. Ok, I'm drooling now. So on to the DIY.
I bought a bunch of white onesies for Zoe and though I could -as I said- jazz-it-up a couple. Also, I had this sweater I bought in a consignment store for a couple bucks, but I wasn't so crazy about the cutesy sheep design.

What you need:

Onesie
Masking tape
Brush or foam brush
Fabric paint
Pattern hole puncher
Adhesive cardstock
A piece of thick paper

Materials
With the tape I made striped. I used a combination of colors and widths. It created a sporty look. Just tape the onesie making your design. Add the piece of thick paper inside the onesie, so the paint doesn't go through the other side and seal the onesie shut when it dries. Paint the area in between the tape - I had my foam brush moist, not wet, to thin out the paint a bit. Let I dry. Do the same with the back. Make sure to touch up the sides too, where the design matches. I would advise it to wash the onesies before dressing your baby, that will also help the fabric paint to feel less stiff.
I also used this technique on the sweater. Then, I used gold paint to cover the sheep design.

Planing stripes

Sweater - before the paint


The other way to add print to your baby's clothes is to use self-adhesive paper and a hole puncher (it can be any design you want, I went for oversized circles and stars). Punch your self-adhesive paper leaving a good amount of space around it so you don't get paint outside your design. Stick to where you want to paint, dab your brush, but don't forget to put a thick paper in between the front and back again. Be careful to not use too much paint or it will seep through. Remove sticky paper and move to another area. Repeat until you feel your design is complete at the front. Let it dry before you do the back. I chose to do my star design on the back of the sleeves but not on the whole back, so it would not overwhelm the onesie. I just add one star near the bottom for fun. On the large dot design I decided to use a iridescent white paint over the white onesie. It is a subtle design that will work with many printed bottoms.

Just a little dot goes a long way - and can you see my paper in between layers? Very helpful little trick.


These adhesive cardstocks are so easy and helpful to use
The finished product.

That's it. Simple and easy. I hope you enjoy and have a happy new year!!!


Monday, December 17, 2012

DIY - Window Panels

These are the easiest panels for someone in need of a dark room at night.
It's a very easy project that can be done in under one day - except if, like me, you have a baby and need to stop often to care for your little one. Luckily, I had a great husband that was able to watch her so I could complete this almost uninterrupted.

Window Panel

What you need:

- Fabric (yardage depends on your window size, but I had bought my fabric a long time ago and was able to work with my 6 yards. Also, remember to account for the repeat).
- Black-out lining (again, yardage depends on your window size. I had 6 yards)
- Scissors
- Ruler (L or T shape is better to square the fabric)
- Chalk
- Thread
- Pins
- Sewing machine
- Curtain rod (I used a tension rod since at out rental I can't drill holes on the window walls)

I started by measuring my windows and making a little sketch.

Sketch and notes are very helpful

With my measurements I planned to add 2" on each side, so I can press 1" and then another 1". I added 4" to the hem to have a 2" finished hem (press2", then press 2" - to save fabric, you can instead press 1/2", then press 2"). Lastly, for the top pocket (where the rod will be inserted) I added 3" for a 3/4 rod, so I would have 1 1/2" pocket. You can make that bigger if you prefer, especially if you are going to open and close the panel a lot, so it's easier to slide.

For the black-out lining, I cut it to the finish size, because the lining will fit inside the pressed folds and there is no need for extra bulk. For the ties I cut 2 pieces at 5" wide by 24" long. (I just used the scraps from the sides of my fabric.

My cutting table was filled with other projects, so I went ahead and cut the fabric on the floor.
If you are making more than one panel, you might consider the repeat of your printed fabric. The repeat can be a small one like 1/2" apart or a large one that might measure 36" apart. It all depends on the print you pick. I measured my fabric, then I had to skip a whole 22" to get the same bottom for my other panel. This way my panels will be even when set next to each other. It is a good idea to get some extra yardage when buying your fabric to account for the repeat.
After, measuring and cutting my fabric, I pressed it and then pinned it with the lining inside. Just be careful where you pin the lining since black-out creates a hole where it is pinned. I just pinned it where it was going to be inside the panel folds. You can use a ruler to help you press the hem and side seams all at the same size.

Pressing, steaming and pinning are your best tools!

Prepare to pin a lot. The black-out lining does not stretch as much the outer fabric while going through the sewing machine feeder. I originally pinned the sides at about 12" apart and then while sewing I added more pins as I went at about 3"-4" apart.

Here, the lining is placed inside the panel to be pinned. The sided will be folded 1", then another 1" hiding the lining's raw edges. The hem is folded 2" then another 2". This way, there is no extra bulk.

Pinned and ready to be stitched! Remember to just pin the lining where the outer fabric will cover, to hide holes created by the pins.

Here is a better view of everything pinned together. The top is left open because it will be the last thing to be sewn.

You can see over the pins (just slow down when you get close to it) and occasionally break a needle as I did or you can remove the pins as you sew.
Sew the sides first, then the hem. Lastly, sew the top pocket, but don't close the ends - that's where the rod will go.

Make sure to hold the fabric tight and to sew fairly slow. This will help to avoid broken needles and puckered seams.

For the ties, fold the 24"x5" fabric inside out, so it becomes a 24"x2.5" piece. Sew along one end and the long side with a 1/2" seam allowance. Trim corner, then trim seam allowance to 1/4". Pull the fabric out to get the right side to show.

One tie done, another one to go. Cutting the corner and the seam to 1/4" helps get rid of bulk and give a crispier look.

You can use a wooden spoon or just your fingers. I also used a T-pin to pull the corners out after I reversed it. Press it so it lays flat. Now, fold 1/2" in on the open side to close the tie and top stitch it. Fold the tie in half - this time lengthwise. See a button hole with the two ends touching, so they are attached and then you have a hole to hang the ties.

Well, that's it. You just made a panel. Just hang it up, after sliding the rod through the 1 1/2 pocket. Enjoy your nice dark room!

Hang and enjoy! I think I am ready for a nap!


Saturday, November 24, 2012

Happy Thanksgiving!

Sorry for my late post, but I wanted to wish you all a happy -belated- Thanksgiving!
Zoe's first Thanksgiving

I had decided to not go shopping on Black Friday since my experience in retail makes me well aware of the crazies out on the streets on that day. Also, there is nothing really that I need so I know I will spend on unnecessary items. However, laying in bed yesterday morning I see an ad for Macy's Black Friday specials and since there is one a block away from my place I ended up stopping by with my 'Oops! Sorry sales attendants, I know you could do without me, but I promise I am a civilized shopper' face.
In spite of my aversion to Black Fridays, I ended up finding some great deals.
What about you all? Did you do to any crazy midnight shopping?
Some sparkles for me
I found these pants for $4.99 and it worked great with a tee she  already had.

...and after all that turkey, what is there to do?

Wednesday, October 24, 2012

Fall, birthday boy, and some deliciously simple carrot cake

It is Fall! The leaves are changing and the temperature dropping. I know this is a lot of people's favorite season -- not mine, mine is Summer if you ask me. However, this past week I realized how I take it for granted the beauty of Fall. It's been 7 years since I moved to the States and I quickly forgot or got too used to the great spectacle of Autumn. So much color. I had friends over from Brazil and they wanted to take photos of the amazing colored trees. My friend said to me: "it is so much color; green, yellow, orange, red, purple, brown." I realized I never really stop to appreciate Fall because I am too consumed with getting sad that Summer is over.
Is during Fall also that I celebrate the birth of one of the most important person in my life: my best friend, my soul mate, and my love. His birthday was this weekend, so we took off for a fishing trip (fishing for him, shopping for me and little Z).
My husband's favorite cake is carrot cake, so I made this recipe for his birthday with some minor changes.
Instead of the 1 1/2 cup of oil, I just added 1 cup and then I added 1 small can of pineapple chunks, a small box of raisins, and about 1/3 cup of chopped walnut. For the icing, I wasn't sure how much was the amount of the sugar in the box for that recipe, so I just added about 1/4 bag. It was deliciously simple as the name says.
What is your favorite Fall thing to do?

The fishermen in his natural habitat (in Branson, MO) and lots of fall foliage (at the Arch Park)
Carrot cake with cream cheese icing

Friday, October 12, 2012

Nursery decoration and a happy environment

I still feel that I need to do a lot on her room. I had so many pins on inspirations for Zoe's room and in the end I still didn't do half of what I had envisioned.
In the meantime, I couldn't paint or put wallpaper since we rent, but I was able to put up some maps and fun papers up. Zoe loves to look at her inspiration wall and we talk about all the places she's been or will be while looking at her maps.
Here are some tips for a fun, happy environment for your little one: 
An inspiration wall
A mobile they will love
Great morning light

And HANDS! Those are fascinating little things, don't you think?
And they are yummy too!

Wednesday, September 26, 2012

Routine and more.

Zoe - 3 months
So, It's been 3 months already! Crazy how time flies! Our little baby is not little anymore -- Justin said this morning. It is true, she is getting so big, so fast, but now is a lot more fun too. Zoe loves talking and she can go on on her cooing for a long time. She smiles a lot too which is great and she also tries to laugh. It is so funny. I don't have a lot of toys for her and I don't want to overwhelm her with all those colors and noises from those activity centers. She really loves looking at faces and we take her often on walks on the park so she can see nature and hear different noises.


This past month Zoe flew on a plane, had a blast in Maryland with her aunts, uncles, and cousins, and she also went on a boat ride. She is so busy this little girl.

1st plane ride

Boat ride
 
Enjoying nature in MD

Working out - morning routine
Throughout the week we keep busy by going to the gym every morning. While mommy sweats, Zoe sleeps, wakes up, and then waits for me patiently. I like to go in the morning to get it out of the way or else I won't work out. Also, right after her first feed and after a little awake time it is when she takes her longest nap, which gives me time to work out, shower and eat when I get back before she has to feed again. I am not very strict with routines but this morning schedule works very well for us.
What about your routine?